How to upload data to Blender GIS
Note
It is assumed that the Blender GIS add-on is already installed and ready for working with spatial data.
Order data for your area of interest in Shape format.
Go to the orders page and download the archive when it’s complete.
Unpack the archive.
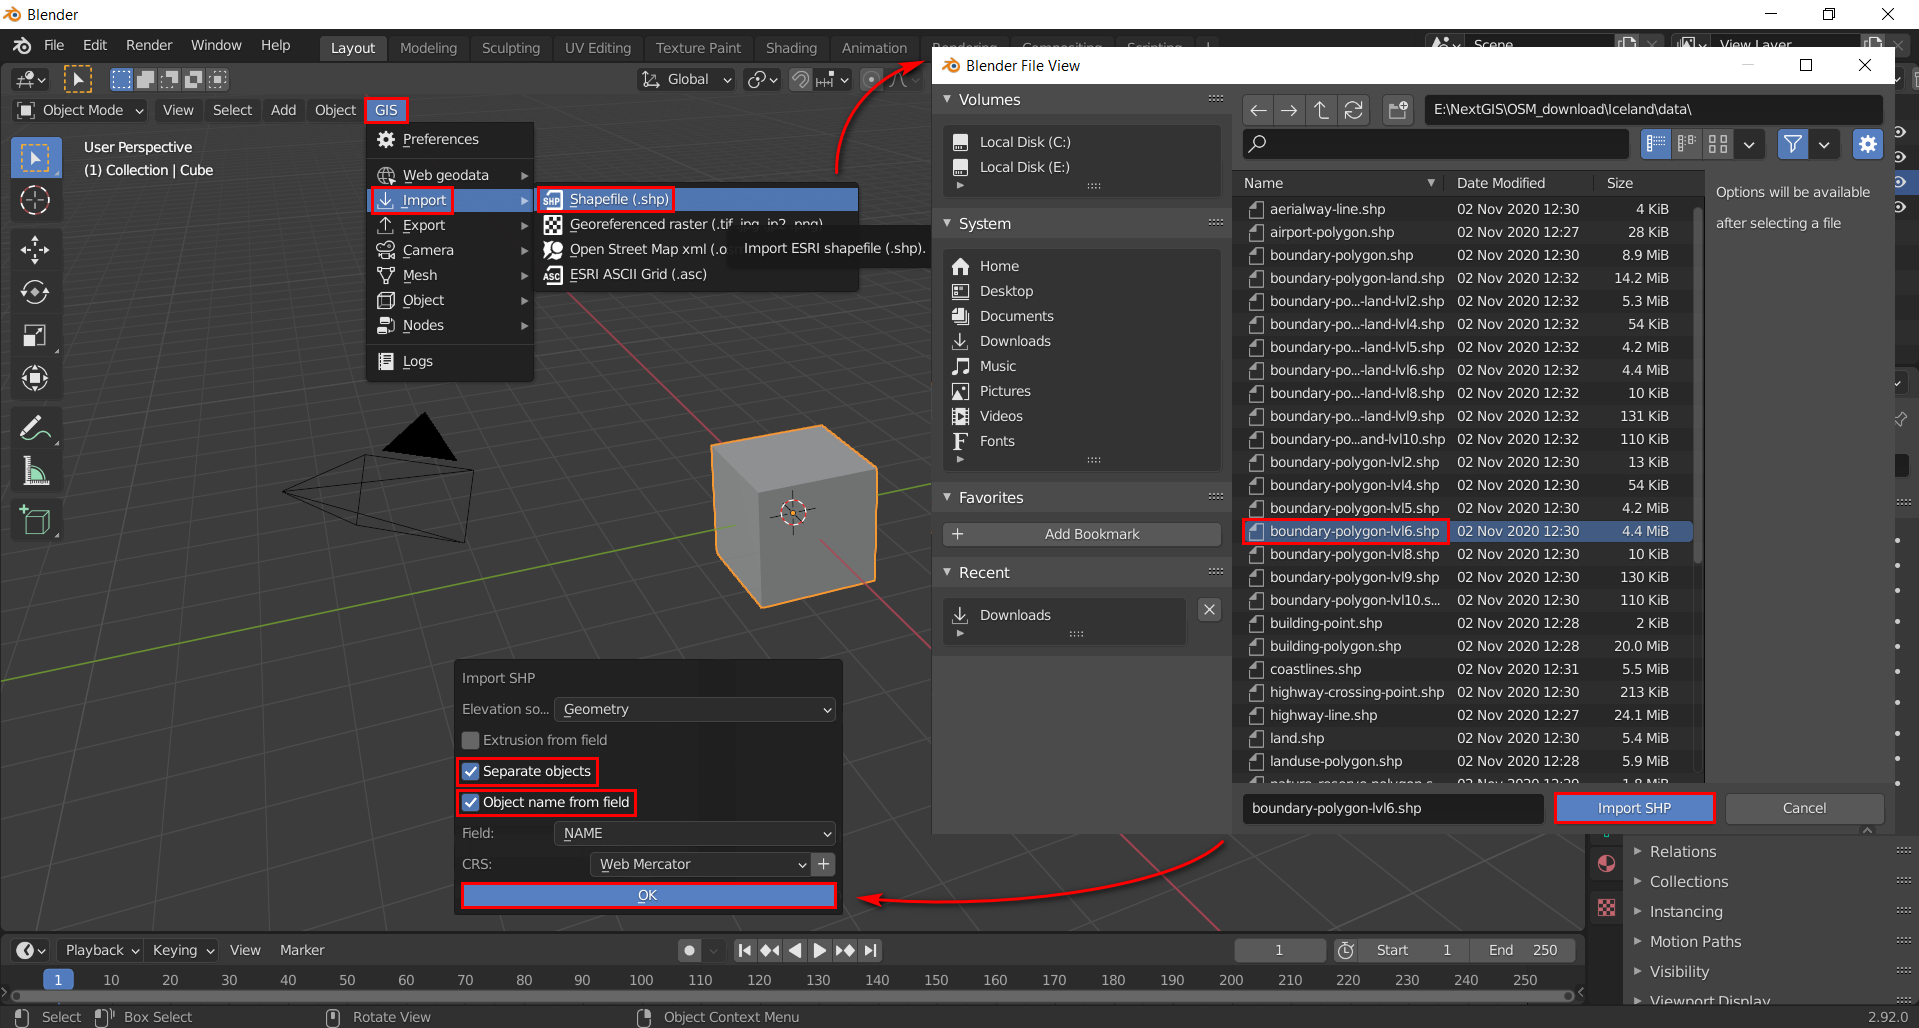
Launch Blender, at the top left select “GIS” > “Import” > “SHP”.
In the pop-up window find the target layer and press “Import” button.
Another pop-up window emerges in the bottom right. Here you can adjust visualization parameters. To display individual objects, and not the outline of the layer as a whole, check the “Separate objects” checkbox. Check the “Object name from field” checkbox and specify the field to identify each object in the layer with. Click “OK”.
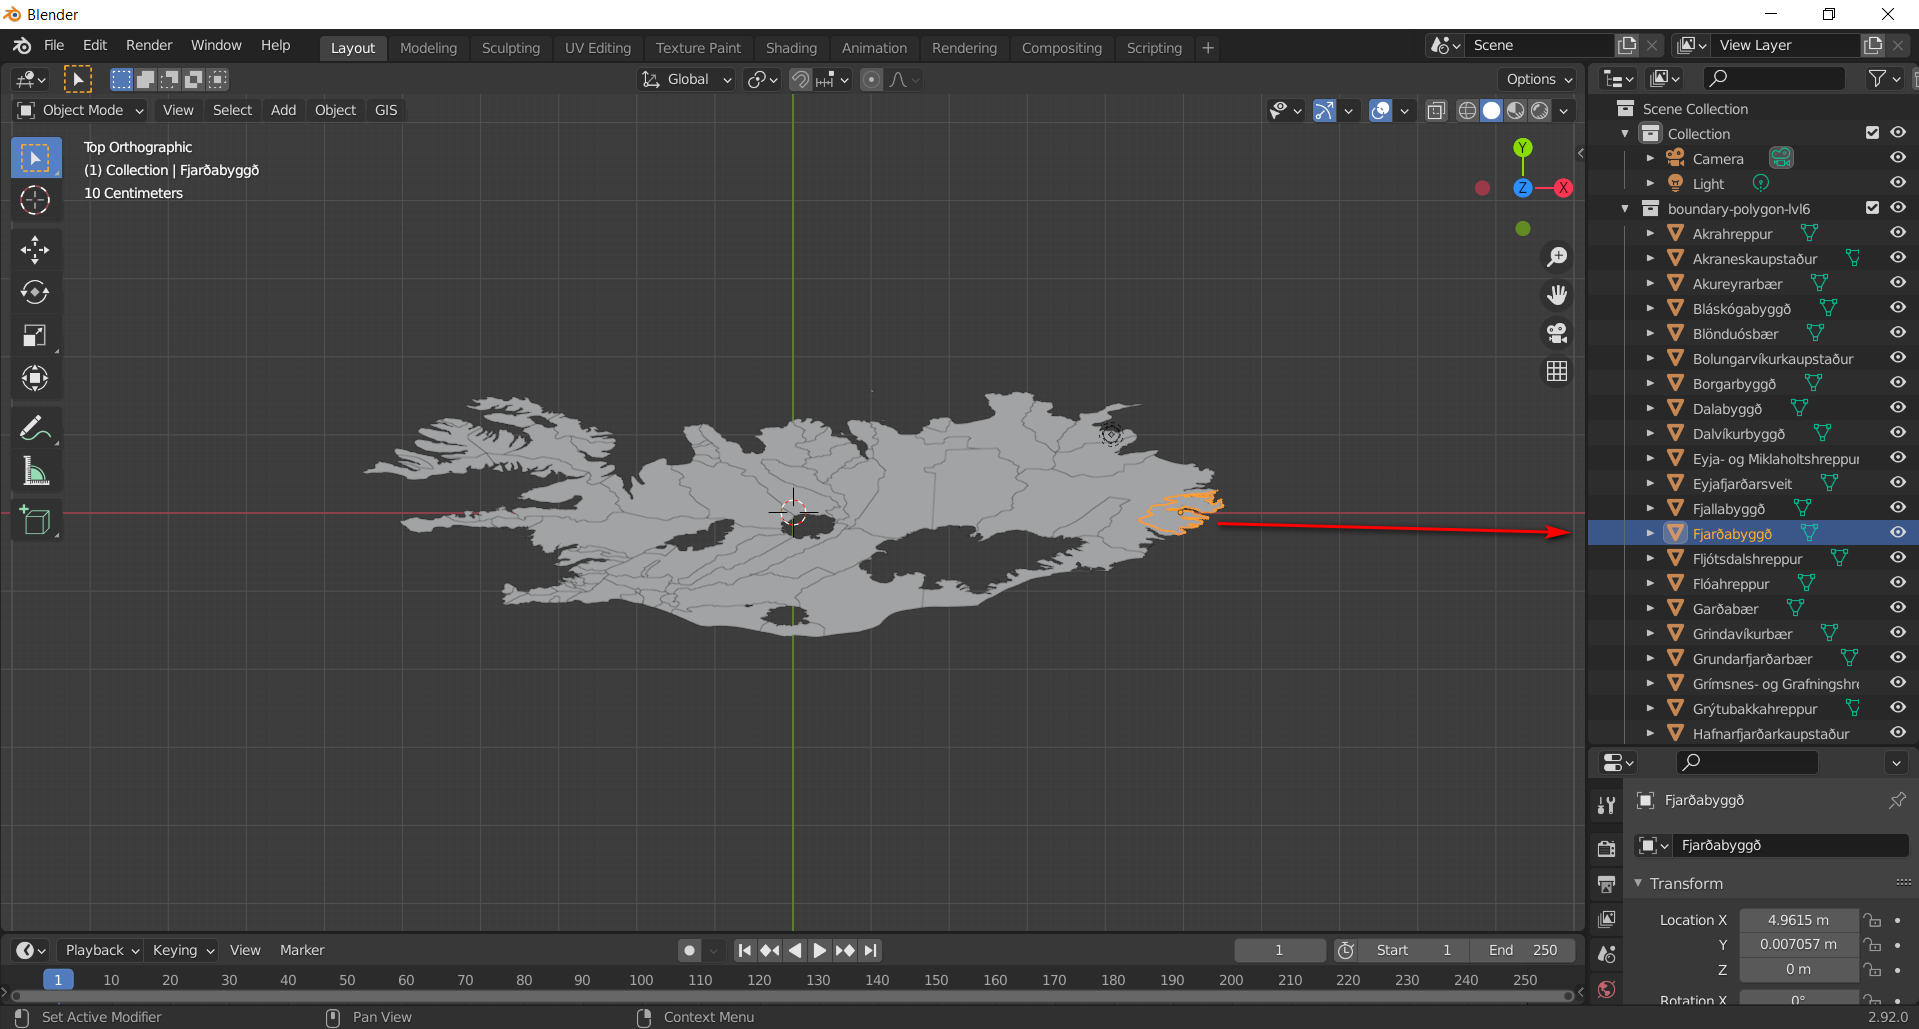
Your map is uploaded. Attributive information of selected object is shown in the right panel.