How to upload data to Locus GIS mobile app
Order data for your area of interest in KML (Google Earth) format.
Go to the orders page and download the archive when it’s complete.
Unpack the archive.
Download and install Locus GIS [1] app to your mobile device.
Open the app and create a new project. To do so open the menu (three stripes in the top left corner) and go to the Projects tab.
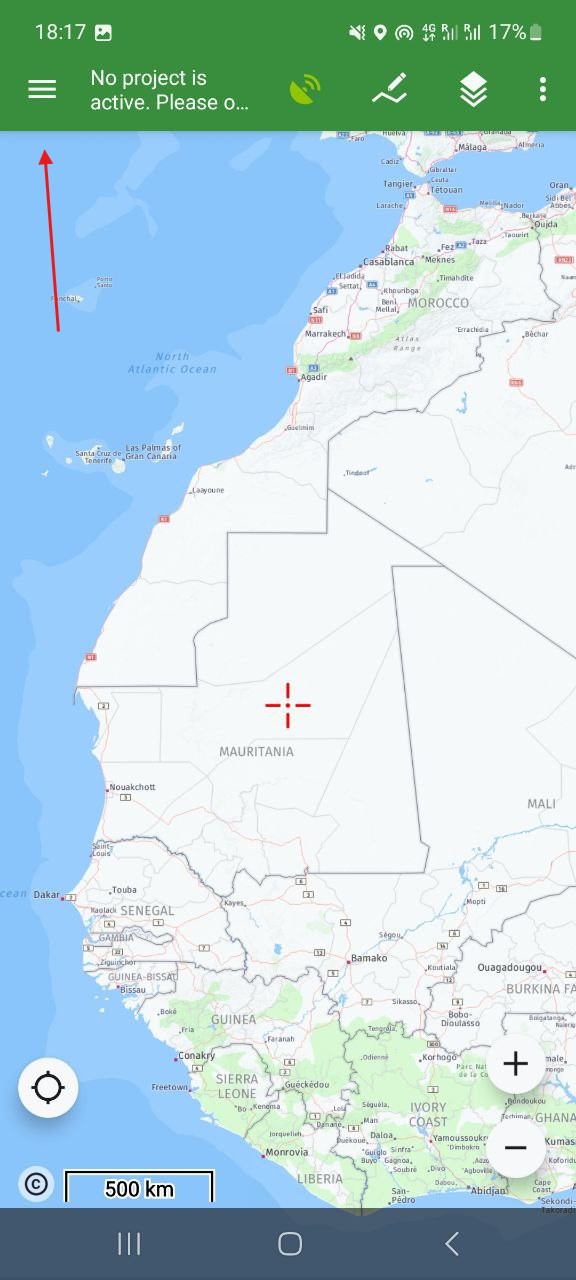
Pic. 22 Opening menu
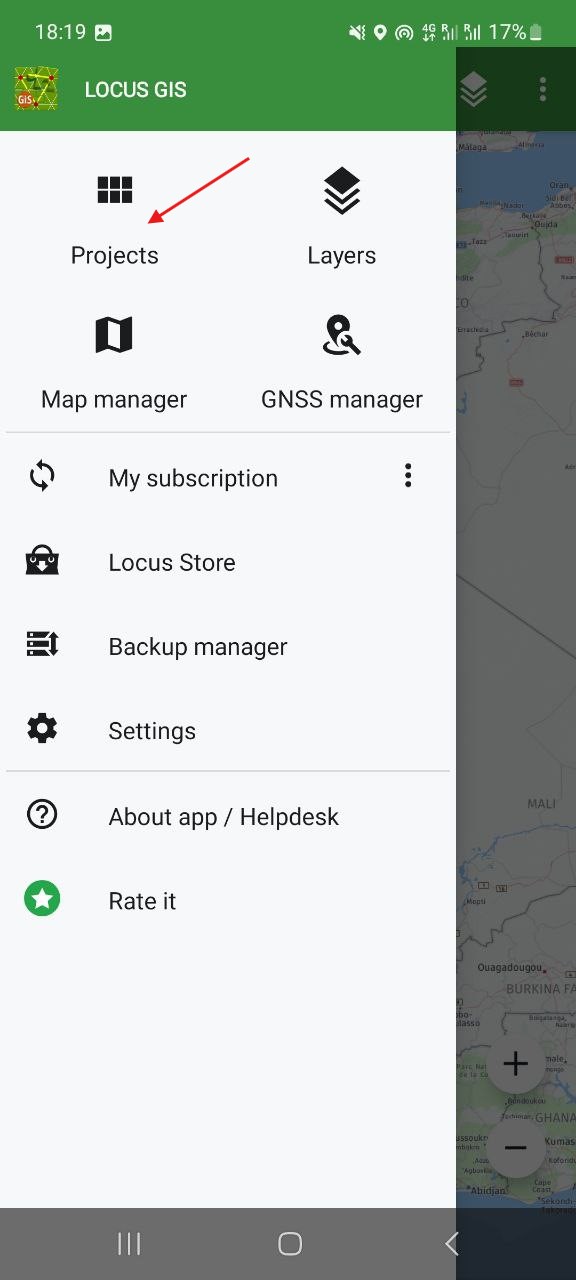
Pic. 23 Opening Projects tab
Press “+” in the bottom right corner and select New empty project.
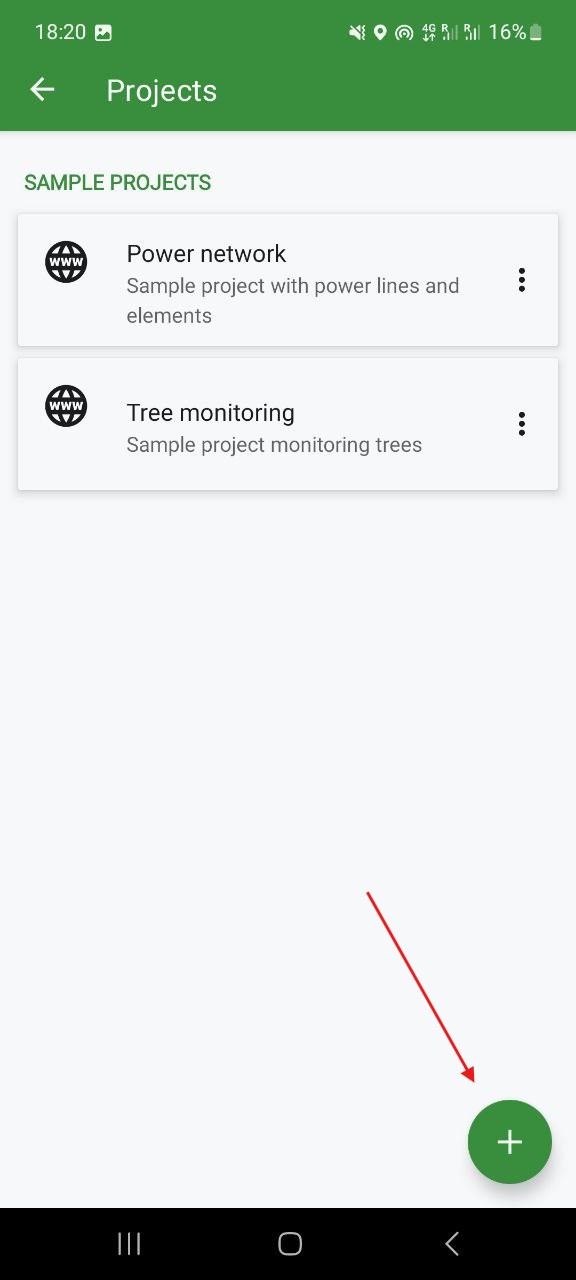
Pic. 24 Creating new project
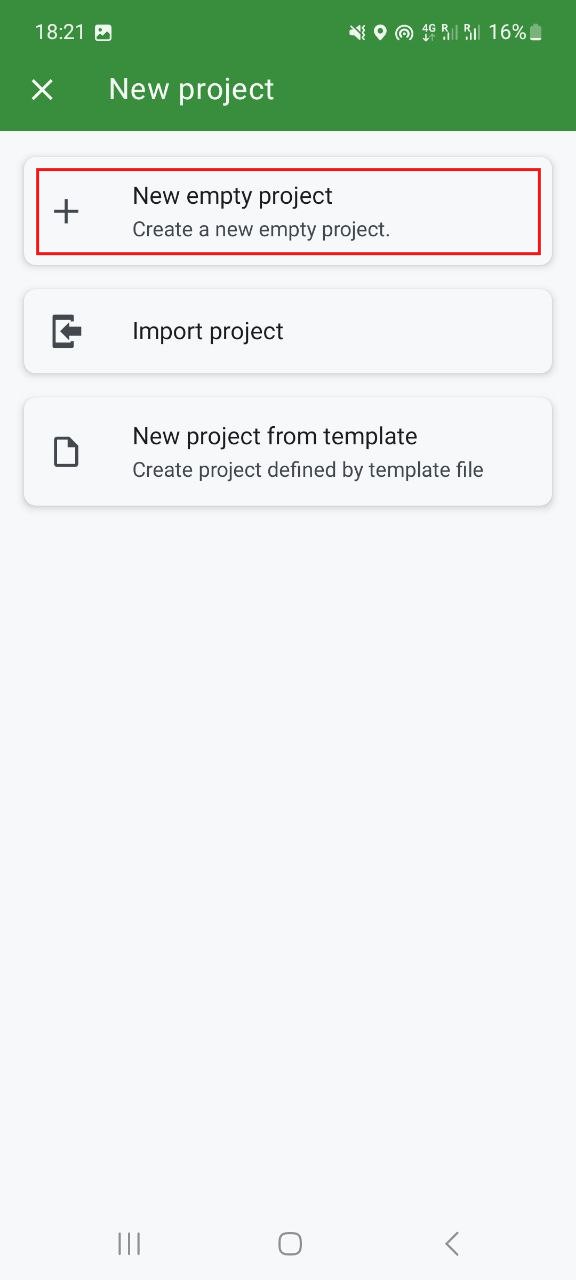
Pic. 25 Selecting empty project
Enter a name for the project, select a Coordinate Reference System and coordinate type. Add description if you need. Then press Ok.
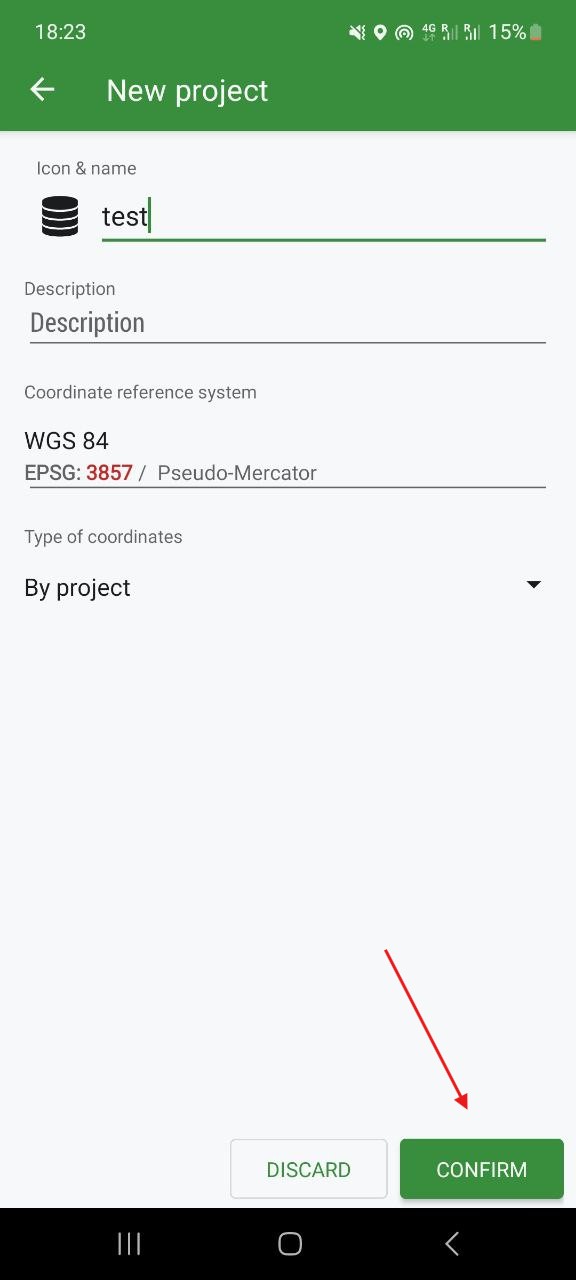
Pic. 26 New project settings
To add a new layer press the “+” in the bottom right corner and in the menu select Display file.
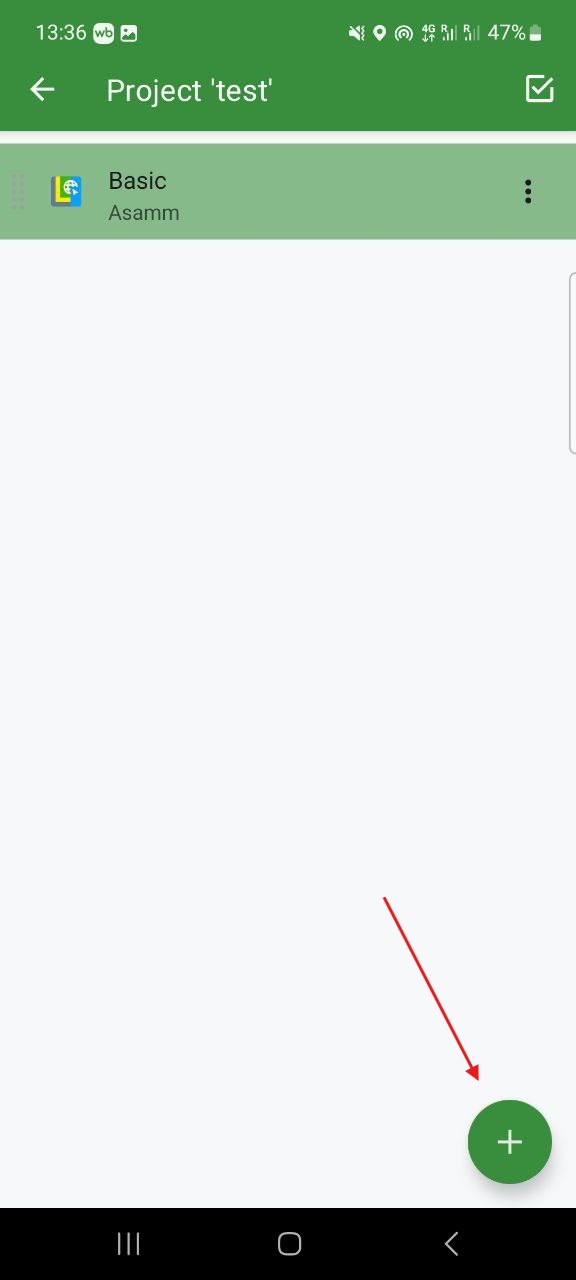
Pic. 27 Creating new layer
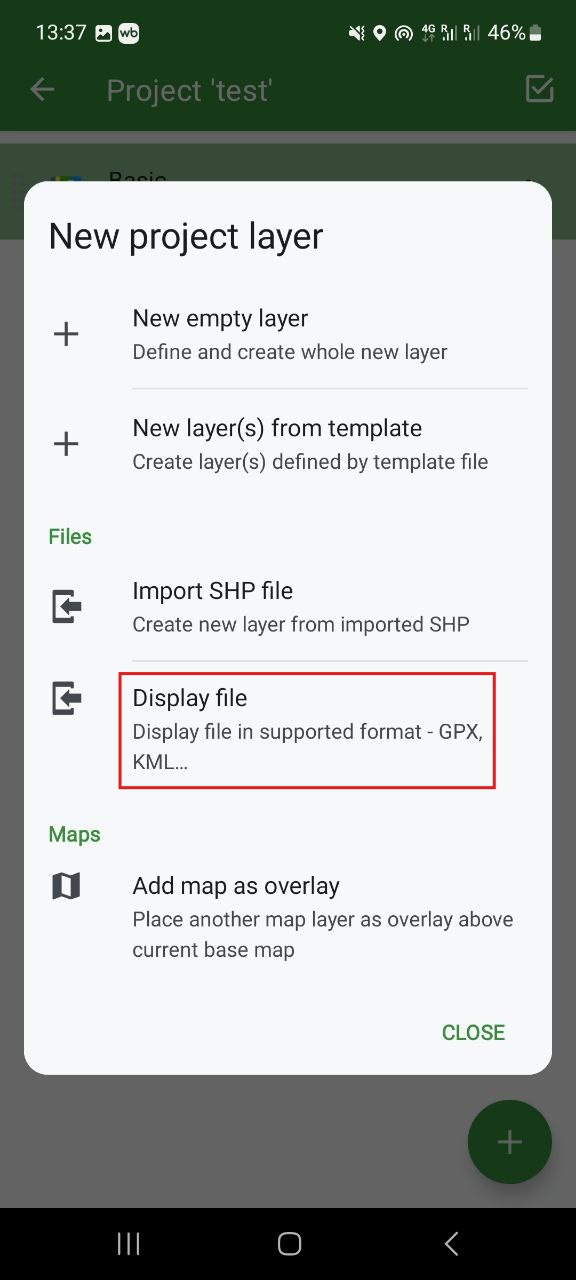
Pic. 28 Selecting to create a layer from file
For the source select Main directory, then open the folder in your device and select the KML file.
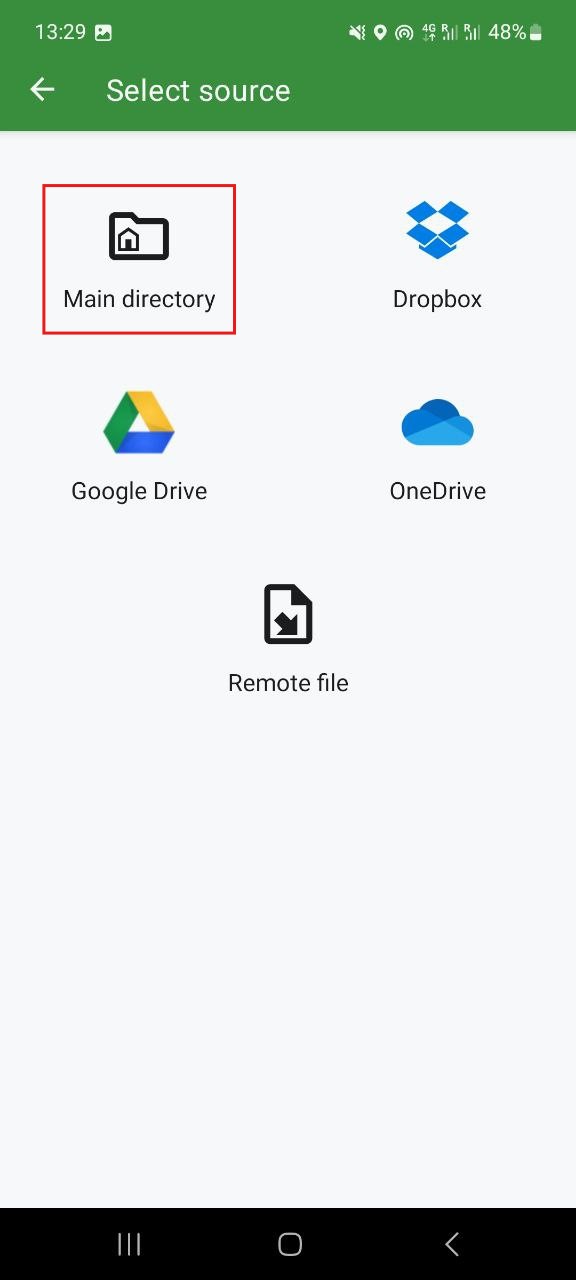
Pic. 29 Selecting Main directory as data source
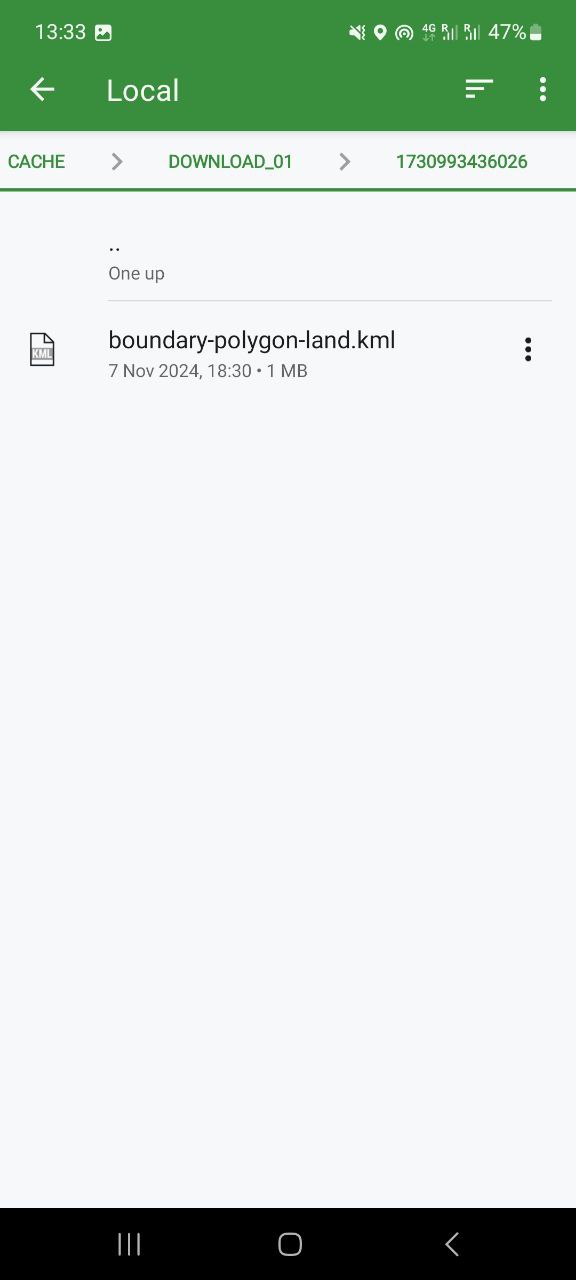
Pic. 30 Selecting data file
A layer created from this file will appear in the project.
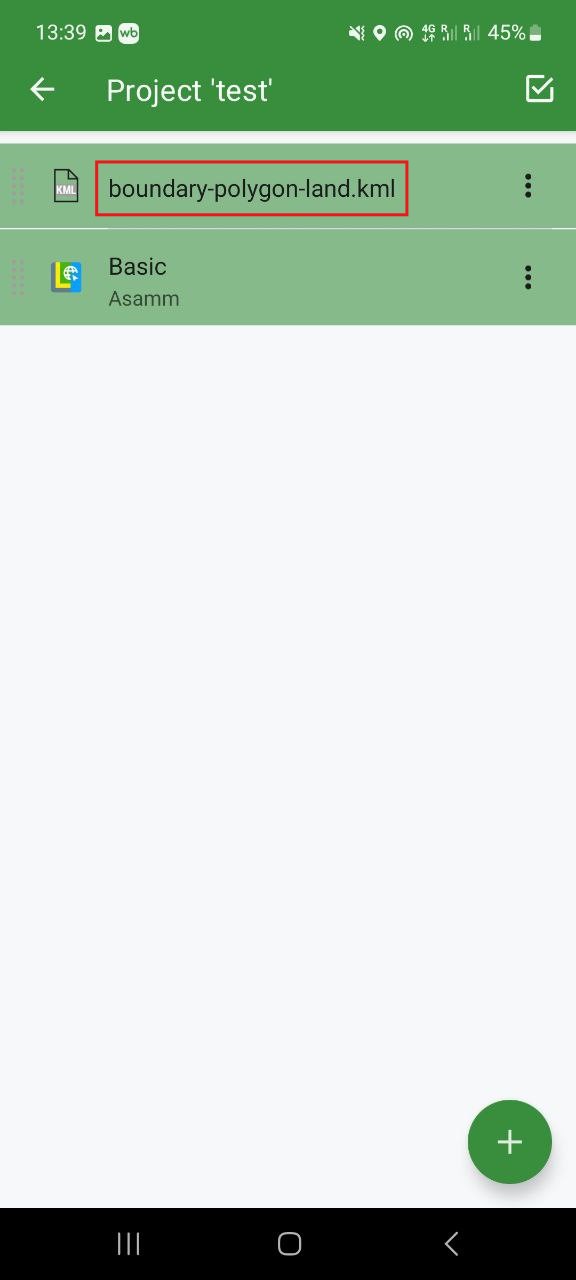
Pic. 31 Newly added layer in the project
After the layer is added open its context menu (three dots on the right) and press Zoom to layer.
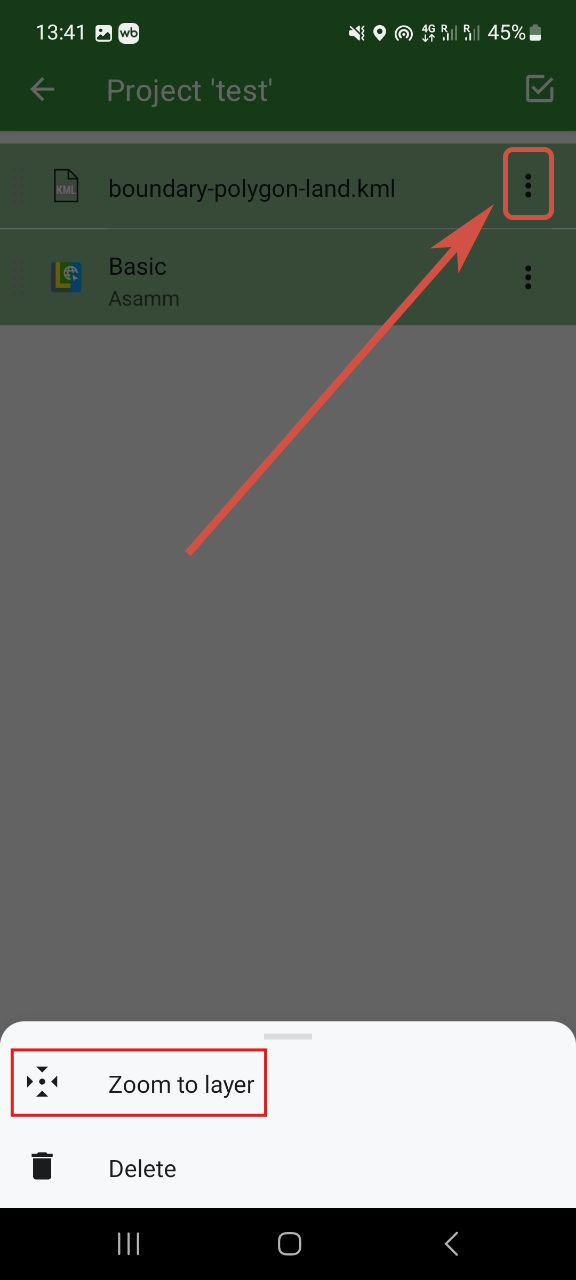
Pic. 32 Selecting Zoom to layer
The data you added will be displayed on the project map.
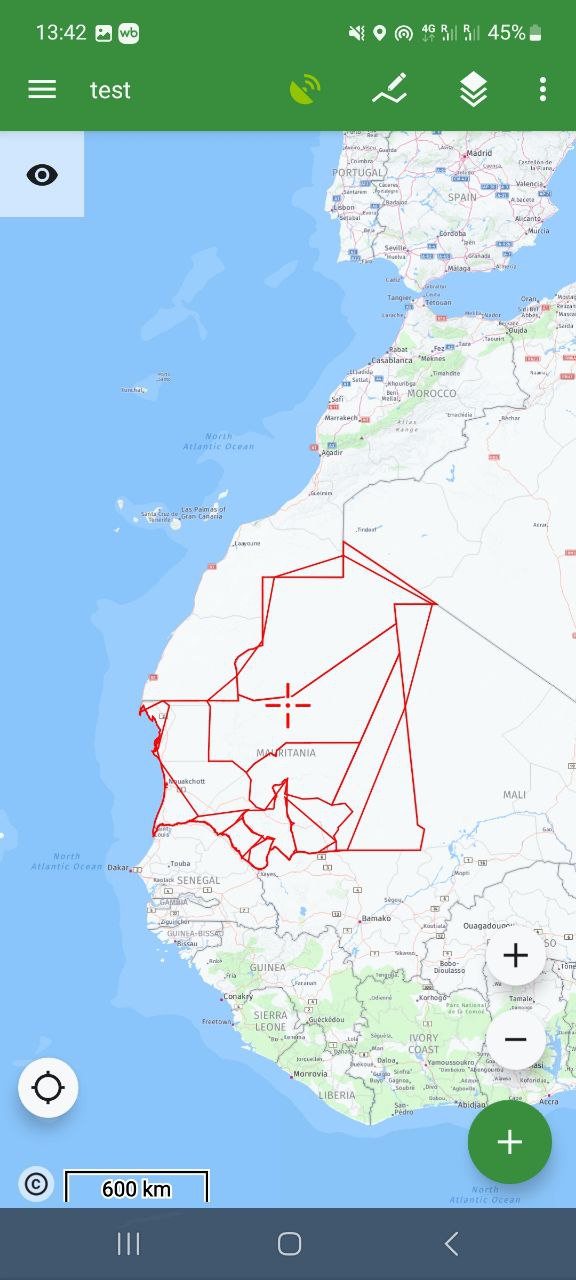
Pic. 33 Data on the map